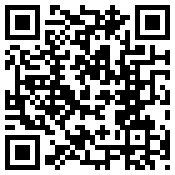
 I’ve had a few clients recently ask about QR Codes and what they’re used for. Some already know, but in short, a QR code is a graphic barcode for printing that lets someone with a mobile device retrieve information from the decoded image. The important things in that statement are printing, barcode, and mobile, because your target market is people with phones, and they will have to have something to decode a barcode on their device, and they will more than likely need to take the image from something printed (unless it’s one of those mall tv ad spots).
With that being said, if your website is not mobile friendly (eg. large Flash intro page) do not bother placing a QR Code to that page because people with mobile devices will have mixed results. To create a QR Code you'll need to visit a website like the QR-Code Generator at Kaywa and enter the text or URL that you would like to use and select a size XL works best for print.
On the next screen you'll receive your code in the form of an RGB PNG. Save this file to your local machine. Next we'll want something we can scale infinitely, so that means vector format, and there are a couple of different ways to go about it. Open it in Adobe Photoshop (a raster editor). Once you've loaded the file, convert it to grayscale, then convert that to Bitmap with the following settings to increase the resolution without losing (or adding) information:
Now you should have a larger black and white version of the file. Save the file as a TIFF. Some people can stop here if they're only going to use the image on a business card, but if you want to keep going to create a vector scalable version of this raster file, read on.
Option 1 - Live Trace in Adobe Illustrator
Assuming you have Live trace available, open Adobe Illustrator and create a new artboard. Place the TIFF (File > Place...) so you can see the image on your screen in the newly created artboard. When the image is imported if you have the option for Live Trace, you will see either "Live Trace" or "Image Trace" in the control palette on the top of your screen. If not, skip this and go with Option 2. Once you select trace, you might receive an error or warning like the one below. If so, simply select OK.The default settings in the old trace panel would give varied results. Also placing the PNG instead of the TIFF would also give varied results depending on the complexity of the URL you're using. To clean up the image a bit, select the "Trace Options" or "Tracing Options Dialog" button to the right of the presets. For this I try to make the artwork as clean as possible using the preview. In CS6 I used the following results for my layout (left) and CS5 (right).
 |
| Tracing CS6 |
 |
| Tracing CS5 |
Option 2 - Making Paths from a Selection
in Photoshop (Old Skool)
If you don't have a more recent version of Illustrator at your disposal (or Adobe Streamline) you can take a different approach. Open the Bitmap TIFF in Photoshop. Open your Channels Palette. This should show a "Bitmap" channel. Hold your Command Key (Apple Key) on a Mac or the Control Key on a PC and select the Bitmap layer with your mouse. This should make a marquee selection. This selection will be the white areas, so we'll need to invert the selection by going to Select > Inverse (or Invert). Now go into your paths palette and select the flyout in the upper right-hand corner. Next select "Make Work Path" and you will receive a prompt asking about the pixel tracing tolerance. Select 2 pixels. This will create a path for you. Double-click on the path to name it.Now you can either use the selection tool (the black arrow) and select the path, then copy it to the clipboard and paste it into Illustrator, or select File > Export > Paths to Illustrator, then open the file you save. Either way you should have a file you can edit in Illustrator that can be scaled up infinitely.
Thanks for reading, and good luck.
Although these are cool, be sure to check out my other blog entry about the Dangers of QR Codes.


No comments:
Post a Comment
I'm going to read this before it goes live if you don't mind.